Wednesday, November 30, 2016

November tatting


I only completed four Spinning Wheel glass mats in November, but I'm still ahead of my goal of tatting one per week for 2016.


This is the one I should have finished last week. It's in size 80 Lizbeth #708, River Blue Med. No worries... I will finish it this week!

Yes, these are two more of Rita Richmond's shuttles (Shuttle by Design). I'm developing quite a collection of these little beauties!


I finished two more Lucky Pennies today, for a total of five in the month of November.


That reminds me... I also tatted 42 Ice Drops in November... not too shabby! ;-)


Tuesday, November 29, 2016

Lucky pennies

I meant to post last night, but once I got on my computer I forgot! Luckily, there is no time clock for blog posting!


Last week, Denise and I decided it would be fun to use Edda Guastalla's instructions to tat around pennies. Denise was able to find rolls of new 2016 pennies at the bank, and she got started right away. I stuck to my goal of finishing one Ice Drop for each branch of my little silver tree before starting on pennies.


Since Denise had done some experimenting, I knew that five rings were all that were needed to cover a penny, compared to the six rings needed to hold a glass gem. The size 20 thread pretty much covers up the penny. Denise suggested that size 40 might work better, and I agree. However, I am much too lazy to walk upstairs to go through my stash of size 40! ;-)


I decided to try reversing the back and front, which really only means that I reversed the side of the coin inside the tatting and attached the ribbon the opposite way.


I think it looks fine, but it hangs funny on the tree. I guess I need to play around with the ribbon some more!

Now I'm thinking that I need to finish a lucky penny for each branch of my silver tree!

Sunday, November 27, 2016

Ready for visitors!

Well, the whole house isn't ready, but my little silver tree is ready with Ice Drops!


My goal was to have one Ice Drop on each branch.


I needed four more Ice Drops to complete the tree.


My mom's favorite color is red, so I think of her whenever I see or use red.


I really like the way the back secures the glass gem. It seems a little more important with the weight of the glass.


After tatting a couple, I got to thinking it might work to make the rings on the back 8+8 instead of 4+4+4-4.


The back does have a slightly different look. I guess it's just a matter of personal preference.


I also played around with picots.


Little changes help to make each Ice Drop unique.


My little silver tree is ready for gift giving. I'll probably keep tatting Ice Drops all the way up to Christmas. I sure would hate to run out!

Saturday, November 26, 2016

Step by step

Well, I finally tatted an Ice Drop that is exactly the way I want it. To top it off, I remembered to write down what I did and I took pictures each step of the way!

First, I highly recommend that you purchase Edda Guastalla's 15 page tutorial on creating bezel settings with tatting. It's only $5.44, and I find it to be very easy to understand. It's loaded with pictures and it really helped me make sense of the whole process. I also recommend this YouTube video on needle tatting with a cabochon. I don't needle tat, but watching the process gave me the ideas I needed to create my Ice Drop.

Are you ready?


I used size 20 Lizbeth thread and a Moonlit shuttle from Handy Hands. I read somewhere that 5 wraps around the post allows enough thread for one ring, so I wrapped the thread around 62 times (two extra wraps for good measure). This is a shuttle and ball pattern.


The rings for the back side are all 4-4-4-4. I usually use a picot gauge, because my picots are all over the place without one. My joining picots were all made with the first mark on my Handy Hands picot gauge.


On the first ring only, the second picot is very large. As you can see, I used the 1/2" mark.


After the first ring, reverse the work and chain 6-6.


I used the 1/4" mark for the picots on the chains.


Reverse work and tat a ring 4+4+4-4, joining to the last picot of the previous ring and the large picot.


Reverse work and continue the ring and chain pattern, joining the last ring to the first picot of the first ring. I used a lock join to connect the last chain to the base of the first ring. Do NOT cut.


Reverse work and tat a 6-6-6 ring.

Tip: I've discovered that if I just fold the ring toward the center (away from me) and move the ball thread to the front, tat the chain, and then lift the ring to join the next ring, I don't get confused by reversing after rings and chains. I hope that makes sense!


Reverse work and chain 8. I used a lock join to join the chain to the base of the next ring on the previous round.


Continue making rings (6+6-6) and chains (8, lock join to base of next ring on previous round).


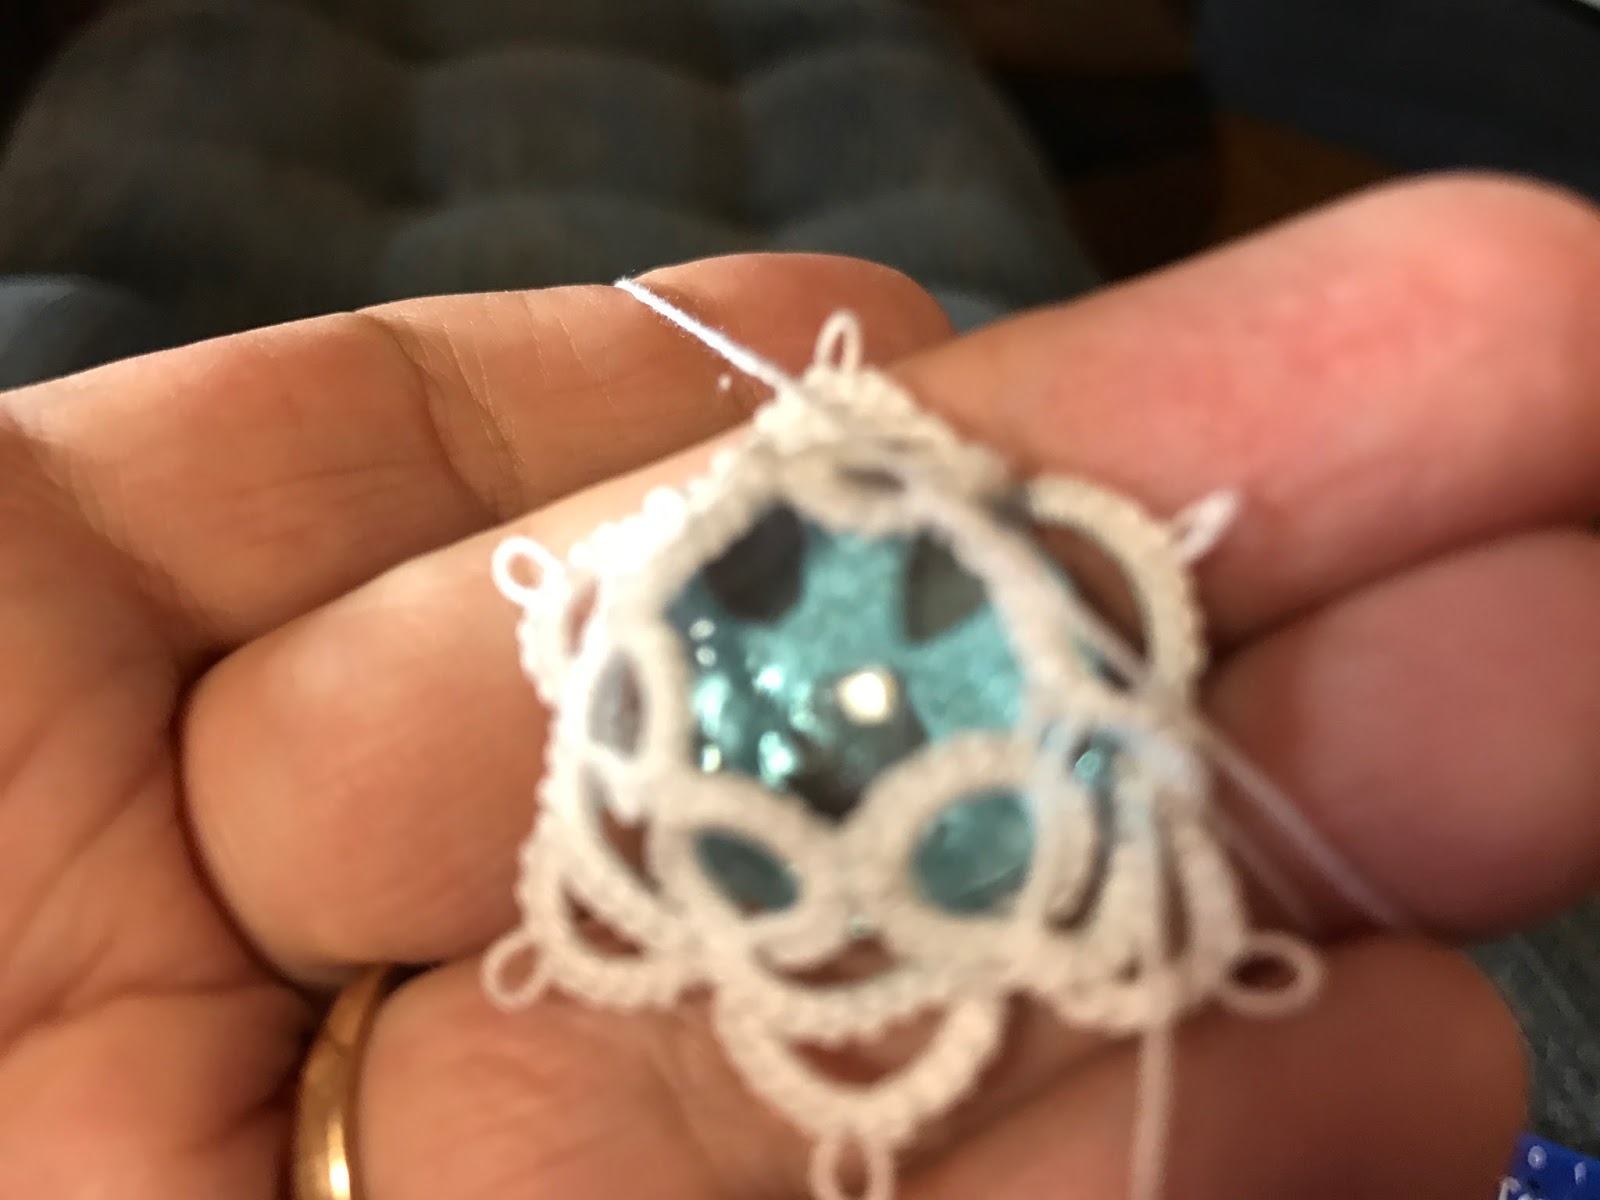
Before joining the sixth ring to the first ring, slide the glass gem into place.

Note: I've been asked about the size of the glass gems and where to purchase them. 

The glass gems I've used are about 3/4". Some are slightly larger, some slightly smaller. The stitch count and/or the number of rings and chains can easily be changed to accommodate any size gem or coin.

If your bezel setting is too loose, soak the finished piece in hot water for about 15 minutes and then let it dry. My thanks goes out to Marie of West Pine Creations for this tip!

I have purchased the glass gems at Hobby Lobby and Dollar Tree in the floral section. I have seen them at JoAnn Fabrics and Amazon. I've also been told that they can be found in pet stores near the aquarium supplies.


Join the last ring to the first ring.


Tat the last 6 ds and close the ring.


Reverse work, chain 8, lock join to base of next ring on the previous round. Cut, tie, and hide ends.


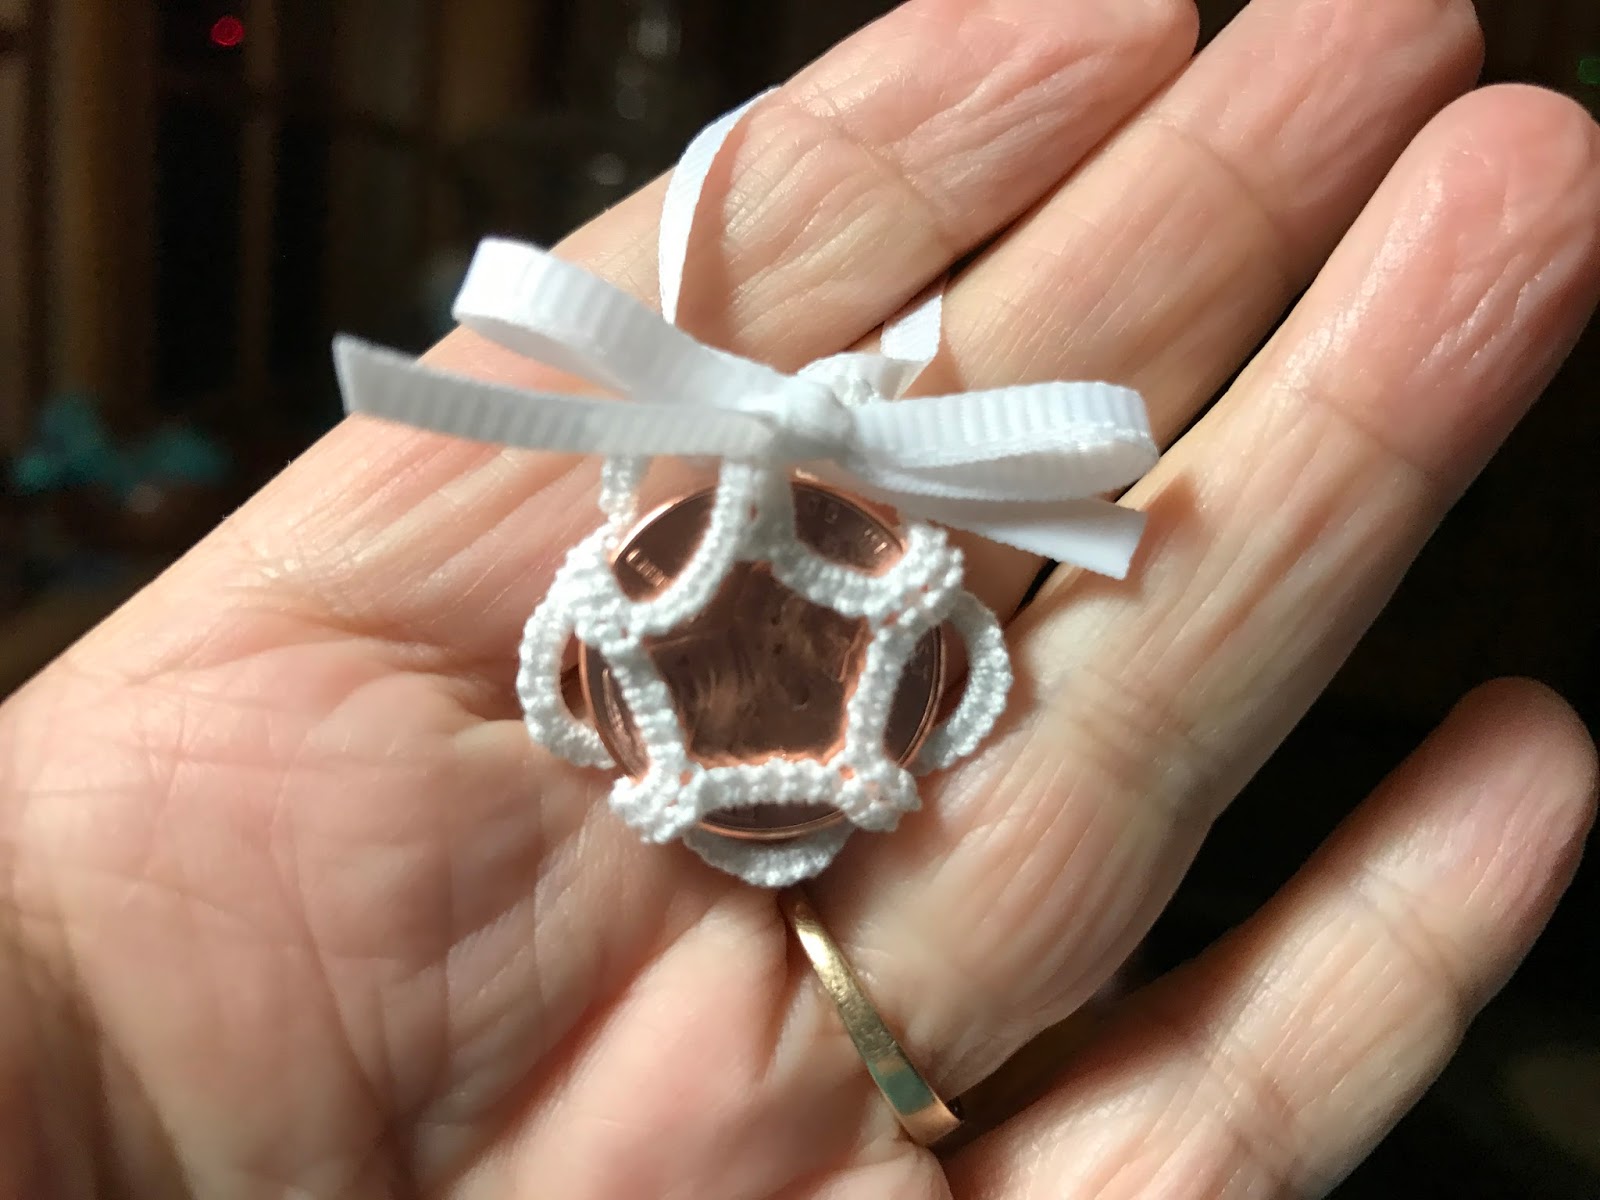
Add a ribbon for a hanger.


And there you have it! This pretty little Ice Drop is ready for the tree, and it looks nice from both sides.

Update for Lucky Pennies: 


I think I've found a stitch count I like. Follow the directions for the Ice Drop, but make some minor changes in the stitch count... On the back rings are 6-6-6, chains are 6-6. On the front, rings are 5-4-5, chains are 7. I've found that I greatly prefer 1/8" ribbon to 1/4" ribbon. There's nothing quite like shiny new pennies!

Friday, November 25, 2016

Family fun

I hope all of you had a wonderful Thanksgiving. I know we did! We've had a wonderful couple of days with all the kids and grandkids around.


In a moment of silliness, the girls and I posed for this picture. From left to right you see me, Alison, Andrea, Carol, and Joanne. My sister-in-law's home was filled with family, food, fun, and laughter. It was a fabulous day!

Even with all of the activity, I managed time for a little tatting.


Another version of my Ice Drop includes a bit of bulkiness.


The back still has the pretty floral design.


For some reason, I just can't seem to settle on a pattern, mainly because I keep forgetting what I did before. As you can see, this one wound up with three layers on the edge.


So, I decided to go back to the basic pattern.


This shows off more of the glass gem, but I sure do miss that pretty little back!

Wednesday, November 23, 2016

As I feared...

I couldn't remember how I tatted the previous Ice Drop.


Luckily, it really doesn't matter, because I think it still looks great!


Basically, I couldn't remember how I joined and turned my work. What I did worked, but I'm not sure I could explain it to anyone. Really, it just meant that I had more joins than I needed.


The chains on both sides are the same size, which just gives a different look.


I think the next Ice Drop I tatted was more similar to the first one. I did add a picot to each chain for a change of pace.


Tatting Ice Drops is really addictive! I have seven to go to finish my tabletop tree. I have too much to finish up today to be able to make all seven, but I'm confident that I can finish by the end of the weekend!

Tuesday, November 22, 2016

Looking for variety

Yesterday was a busy day of organizing, cleaning, grocery shopping, and doing laundry... mundane things that need to be done! Since I was a good girl and put chores first, I did not sit down to tat until after dinner last night. Even then, I was so tired, that I didn't finish the one Ice Drop I started until this morning.


I do like this deeper blue. You can't tell from the picture, but this is another one that is a bit loose in the bezel setting. The glass gem was too large for six rings, so I chose to tat seven rings. It's fine while it's hanging on the tree, but the gem pops out easily. I decided a fix was in order!

A search on the Internet led me to an Italian YouTube video about needle tatting with a cabochon. After watching it, I decided to do a little bit of experimenting.


First, I tatted this little piece as a backing. It was not large enough, so I just tied it off and hung it on my tree.


My next attempt was much better!


I like the way the back encloses the cabochon.


This gem was a little smaller than the ones I've been using. It's a little loose in the setting, but I feel like it is much more secure than the blue one. The real question is, can I remember what I did so that I can make more?

Sunday, November 20, 2016

Dusty Blue Spinning Wheel


I finished my Dusty Blue Spinning Wheel glass mat, and I think it's really pretty! The thread is Oren Bayan size 50. I guess I really don't understand thread sizes, because this is the same size as the ones I've tatted in size 20 Lizbeth, 5 1/2". Oren Bayan thread is much softer than Lizbeth, so I don't think it will work well for snowflakes. However, it does make a pretty doily!


As I've mentioned before, I love Rita Richmond's shuttles! (Shuttle by Design)


I filled both shuttles, and as you can see, I have plenty of thread left. I do like tatting the Spinning Wheel (Tatting with Visual Patterns by Mary Konior) with two shuttles. I find it's easier to carry my tatting with me, and I prefer switching shuttles to using the shoelace trick.


If I finish an Ice Drop each day between now and Christmas, I should have plenty to decorate my own tree as well as enough to give away. Besides, I have some more beads I'd like to try!